
Latitude - 43° 54' 01" North; Longitude 70° 00' 4" West |
|
The Observatory project kicked off with some layout and placement of the proposed building on the lot. We used steel pins and some 2X4's to square up the location.
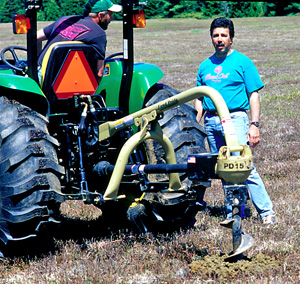
Here a tractor, operated by Craig - a neighbor and great asset to us, is auguring the sonotube holes. And no, that's not Saddam Hussein in another life, that's Little Robbie Burgess
directing operations. |
|
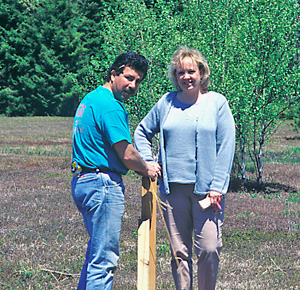
This photo is of Rob & Terri checking out the work previous to the concrete order. Don't think the beautiful Ms. Terri had a pad in her hand to order lunch... Rob was checking and Terri was double-checking the building dimensions. |
|
|
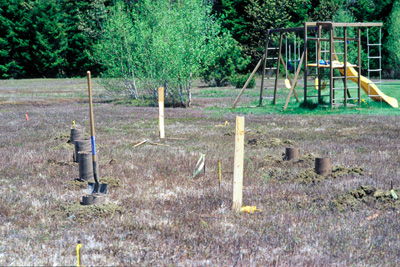
This image indicates the sonotubes placed to accept the 2X6" beams used to carry the deck above. The pair of upright 2X4's marks the centerline where the piers would be installed. Because these were excavated over four feet deep, we trenched between them to have room to work. We used a 12" bucket on the tractor to get the 20" tubes to depth. |
|
|
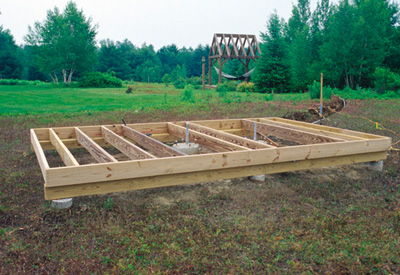
In this image the framing has commenced and we're got the structure underway. You can view the beams constructed from three 2X6 members glued and screwed
bearing on the sonotubes cast three to a side. The piers are also cast and the tops can be seen between the joists. The primary power conduit can be seen
trenched and installed with the termination projecting at each pier head. The building is energized from a circuit by Rob's gazebo, which can be viewed in the background.
A set of four - 3/4" anchor bolts 18" deep were placed in each pier to anchor the steel
tube above that will accept the mount pier cap.
|
| Here we are working on a rainy Saturday installing the plywood deck. We were fortunate to have friends volunteer their time to help when they could and much of the labor was supplied in this fashion. Once you arrived however, Rob would find a way to keep you there and make you work; he was quite good at this actually and didn't care how hard it rained, sleeted or whatever. This was okay with me as well as we were anticipating completion and putting it to use. Building the Observatory on weekends in one's 'spare time' is no easy task and the weekends came and went as we plugged along. The concrete pad for the front stair can be seen in this photograph. |

|
|
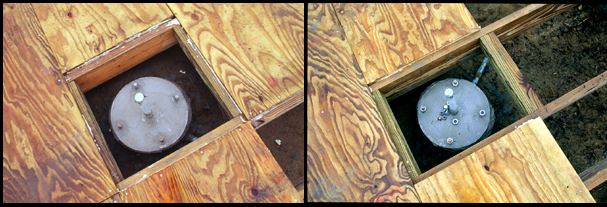
This image shows both pier sonotubes framed out and prepared to accept the steel uprights Rob had custom built. We used a steel leveling plate grouted in place to ascertain we
had the tops of the sonotubes level and true. The tubes had been cast a bit low to allow for this grout joint. Plywood hatches were later constructed to allow
access to the pier wells and carpeted to match the surrounding floor.
|
|
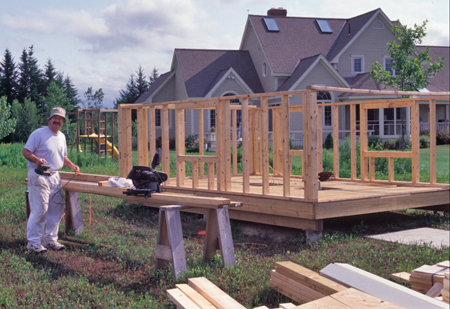
Things are looking up! Out of the ground and starting to frame the walls. Rob wanted to install windows so the Observatory looks more like a nice outbuilding; you can view the framing for the three in this image. You can also see his home in the background and understand why he would be interested in making things look 'normal' and nice. Mark is preparing the carrying framing that will form the rolling roof support. Mark was selfless in dedicating what time he could and proved to be a great help when we needed it most. |
|
|
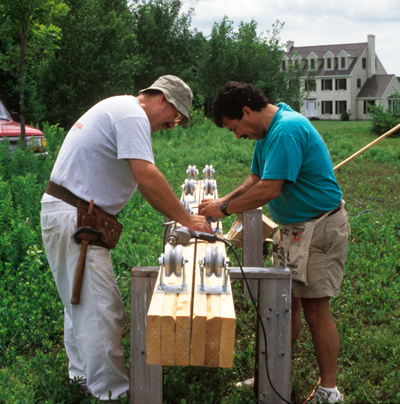
This image shows Mark and Rob putting the final touches on the rolling roof members in preparation for mounting. During the framing stage we could work
multiple crews and we had some great help when this was going on. The V-groove rollers have grease fittings which were supposed to be mounted on the
inside to be accessed. I may just as well own up to it now - I installed one of the beams with the fitting to the outside, where it can be accessed
but not easily as the fascia board covers it. If these wheels ever need to be greased I know who will be doing it...
|
This is a full view of the framing in place with the Observatory roof receiver constructed. The rolling roof beams can be seen in place, ready for the trusses and Chris Turner is installing the 'L' channel steel sections that the V-groove wheels ride on. Chris was really instrumental in the carpentry phase and a valuable asset, besides being an all around good man. Your help was/is much appreciated Chris! |

|
|
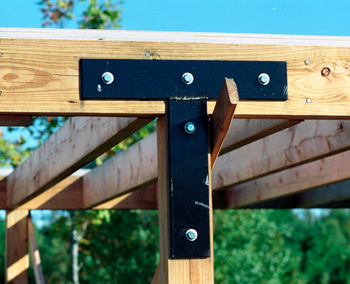
This view is a typical detail of the supports Rob had produced to stiffen up the receiver structure, in this case the middle upright, but these were installed on all uprights. You can also see he added framing members between the outside rails, but I believe this was more for camouflage to make the building fit into the neighborhood than required for structural integrity. |
|
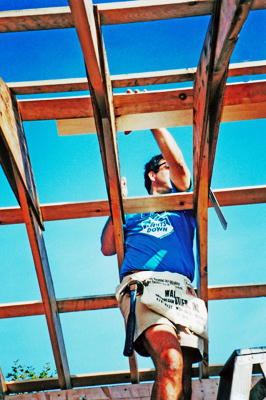
On to the roof! This image is none other than Wonder Boy Little Robbie Burgess preparing the rafters to accept the metal roofing. We were fortunate to have a great crew of guys one Saturday and we constructed and secured the rafters in one session. |
|
|
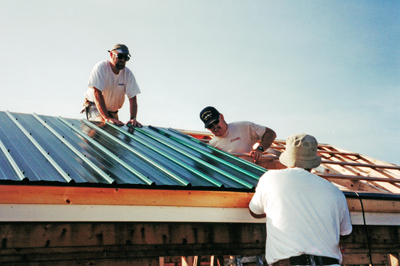
This photograph depicts the metal roofing being fastened to the rafter strapping. Everything squared up well before the rafter installation and this really stiffened the structure up. |
|
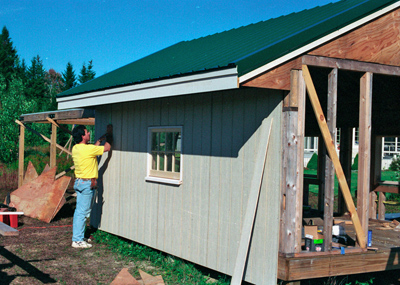
Here's a view of Rob nailing the T-111 siding to the wall frame. This material works well in this application and painted up nicely. You can see the window trim is in place at this time. |
|
|
By now the outside work was in fairly good shape and we were getting ready for the long winter chill. We worked on the exterior wood details and Rob
painted as time permitted. The days of the larger crews were pretty much behind now and we struggled a bit to find time to get the detail work done.
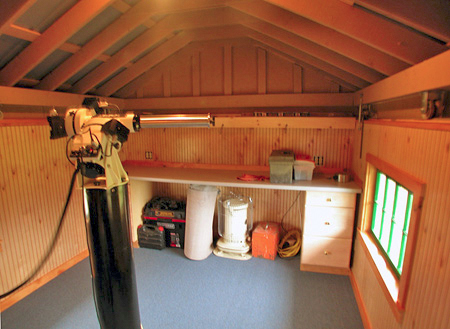
However, now we were preparing to set up the equipment that the entire task was designed for and we looked forward to it. This photograph is the rearward
pier with Rob's 900 GTO mount installed. You can see the work station and tool boxes as we used the interior for storage as we finalized the details.
|
|
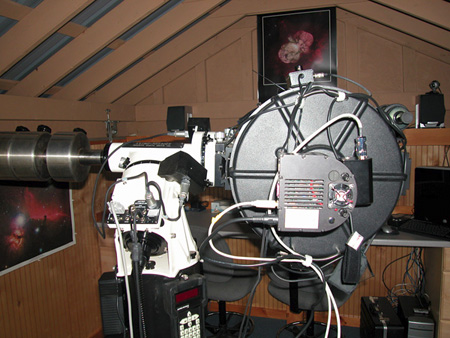
And at last, after many months of labor and expense, Rob's C-14 SCT telescope is mounted and being prepared for use. At this point there were both
interior and exterior items to be completed. Rob really stepped up on the interior electrical work and ran the cabling under the deck to each pier.
There are many lines exposed with both instruments in place but the electrical lines run into outlets mounted at the steel piers and are easily accessed.
|
|
|
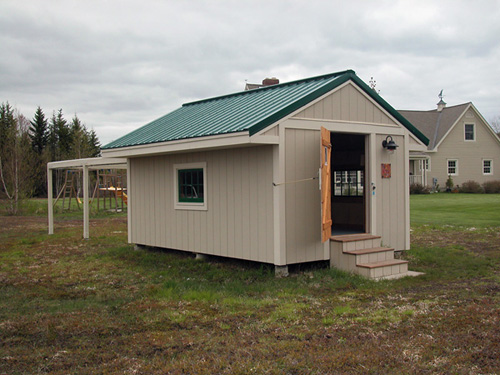
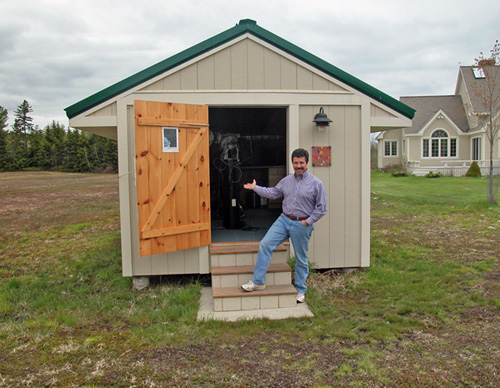
Here it is! Starburst Meadows Observatory, completed except for detail work and finishing touches... This is the western elevation with the entrance door in view.
|
|
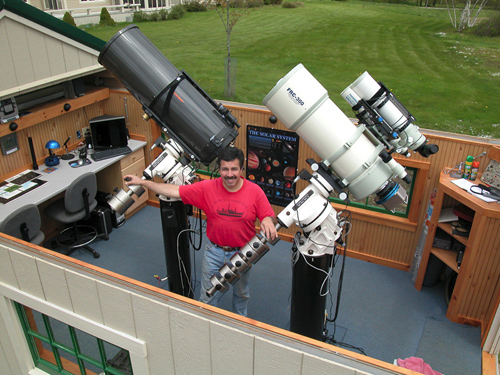
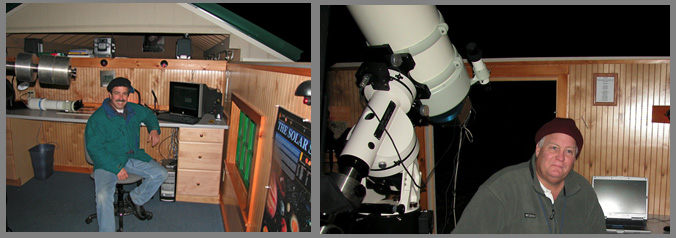
The next several photographs provide good views of the telescopes in place at Starburst Meadow Observatory. Not exactly run of the mill equipment...
Rob has a Celestron C-14 Schmidt-Cassegrain design on an Astro-Physics 900 GTO mount; it's the gray tube his right hand is resting upon. The other instrument is mine,
a Takahashi FRC-300, an 11.81" Flat Field Ritchey-Chretien designed astrograph. This means it's designed to image and not necessarily for visual use.
It can be used visually and we've done this, but the large, precise focuser makes it a great deal of work to use with an eyepiece. The FRC is mounted on an
A-P 1200 GTO. The mount one uses is mostly a function of the required payload and by the time you get to the Astro-Physics
level, you're right up there in what is available in astronomy quality.
|
|
This photograph indicates the initial telescope systems in place with a bit better understanding of the size scale. Both are much larger than we ever anticipated installing. We've learned to be careful when slewing because they can collide although we've never allowed this to happen. Rob's C-14 has a terrific image scale and it's a joy to use visually. These images provide a good look at the interior work stations. Remember you can't have a heat source around the optics, so you can believe it gets somewhat chilly at night during our Maine winters... |

|
|
Using SMO - here we are, the Dynamic Duo waiting for astronomical twilight to end... This view shows both end walls of the Observatory. I'm using a laptop next to my telescope and Rob is seated at his computer station. Now we have two computers installed at the work station. You can get a great look at the quality standard Rob has for the facility. I doubt you'd find a better looking Observatory interior anywhere. |
|
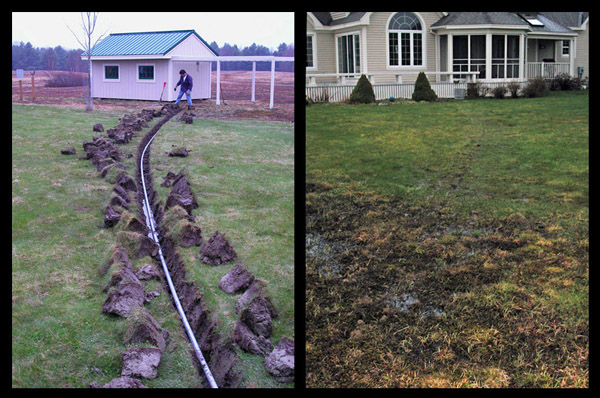
Some things we considered once the Observatory was up and running included a Internet connection, a motorized roof rolling device and eventually full automation of the telescopes for remote access. Two and three of this list remain pending, however, the Internet connection was a task that could be accomplished easily enough. These views are of the conduit we ran to transport and protect the cable to the building. The left image is the trench looking towards the Observatory with Rob preparing to bury the conduit. The second is the trench backfilled looking towards the house where the cable originated and is supported by a router inside. This connection works great and is a wonderful thing in keeping the computers updated with the latest software upgrades. The automation probably won't be completed this year, but we've been investigating software now available that will allow a complete imaging session including shooting CCD flats, bias, dark frames and of course, LRGB filtered images unattended. |
|
|
Rob says 'Come on in!' Starburst Meadows Observatory is a great facility and one I'm sure Rob is proud of; I know I certainly am. We are believers in public outreach and
many people have already enjoyed using the equipment for wonderful views of the night sky. We are both 'expert observers' and work with students enrolled in the
Astronomy 101 On-line classes based out of the University of Maine Orono campus. These days we try to arrange the students in groups at the Observatory as it's easier to get the
visual work done collectively. Rob is a local hero in Brunswick and makes the newspaper about every other week or so. Besides being an all around good man and avid amateur astronomer, he's also the only NASA 'Solar System Ambassador' from Maine. Yes indeed, he's an impressive individual... |